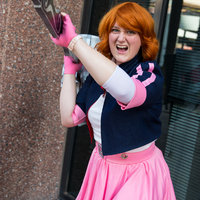
This costume is one I have been wanting to do for some time. I loved Magic Knight Rayearth in Middle School and after re-watching it I find I enjoy it all over again! This costume came to mind when a group of friends started talking about doing a combined cosplay. Since there were three of us we began contemplating trio teams and MKR came to mind.
I will be working on this costume for only 3.5 weeks. I plan on making all of it on my own. Here is what I will crafting:
Wig: The wig was purchased from Amazon. When I received it the bangs were REALLY long and the wig flipped outward (which did not work for Fuu). So a friend and I trimmed the bangs and curled the wig to fit more of Fuu's aesthetic and to compliment my facial structure.
Sword (handle, hilt and blade): I made this with Worbla, Resin, Insulation Foam, Spray Paint and a mild anxiety attack lol. It took a lot of work and was completed in 8.5 hours time (this was also my second iteration of the sword - sword #1 was destroyed...I'm gonna blame the pigeons).
Cape: The cape I created from an existing pattern (see Elsa costume or medieval costume patterns). The hood was custom. I used this site to help me measure the proper size then sewed the hood onto my cape. I decided to use rare earth magnets to secure the cape to the inside of the chest adornment.
Brooch/Chest Adornment: This I made using craft foam, Worbla and easy cast resin (for the gem).
Glovelettes: These were made from to long rectangles and some elastic. I measured my the circumference of my lower arm and the circumference of my wrist for the elastic. I then used the circumference of my arm with 1" seam allowance and cut a rectangle 1.5 times as long as my lower arm. Once cut I did a loose pleat on the glovelette, sewed it up the center and added the elastic to the top and bottom to draw it in.
Arm Band: WIP
Over Dress: I took an old black dress with a v neck and traced it's outline onto my white fabric. I then measured from where the dress ended to where I wanted the over dress to end and marked at that point. From there it was cutting out two equal pieces. I then sewed half way down the sides, slipped the dress on, and used a wash away fabric marker to mark where I wanted the front split to occur. I cut a wave patter into the fabric and trimmed excess. Some hemming, a few corrections to the sleeve width and the overdress was complete!
Underskirts: These were made from stretch polyester (matte). I used the circle skirt technique (I will write a tutorial about this later) then added some elastic to draw in the skirt and tighten it around my waist (effectively creating loose pleats).
Green Belt: Just cut a long rectangle (length was twice as long as my waist and width was the circumference of my lower ribs) then I added some elastic to the top and bottom and pleated the entire belt.
White Shoes: I purchased a pair of off white shoes from a thrift store. They were older, made from leather and had belts on them but the shape/size was perfect for Fuu. I removed the belts then added grommets to the back of the shoes where a slit existed (I believe it was used to make putting the shoes on easier and the belts were meant to keep it closed so without the belts I had to improvise). I then used Krylon Color Maxx and lightly dusted the shoes in paint to give them a lighter shade of white. Once the paint settled I used Krylon Color Maxx Gold to paint the design on the shoes (I could have used bias tape but I could not find the right shade and the paint gave me more control over the tear drop designs on the front of Fuu's shoes). After the paint was dry I glued on the gems then sealed everything with Mod Podge and Lacquer.
Gems: Castin Craft Easy Cast Resin, Resin Gem Molds and Hard Candy Gem Molds, Nail Polish and lots of love.
