MATERIALS
- measuring tape
- tailor's chalk/pen/something to mark your fabric
- pencil
- paper (for patterning)
- hot glue gun
- white felt
- white faux fur
- cotton fill
- dark brown fleece/felt
Just a heads-up: all things written in italics are my own personal examples to help avoid confusion. Expository pieces are not my forte.. I'm also American and can't work with the metric system very well, so many apologies, please forgive me.
PART 1: HEAD MEASUREMENTS
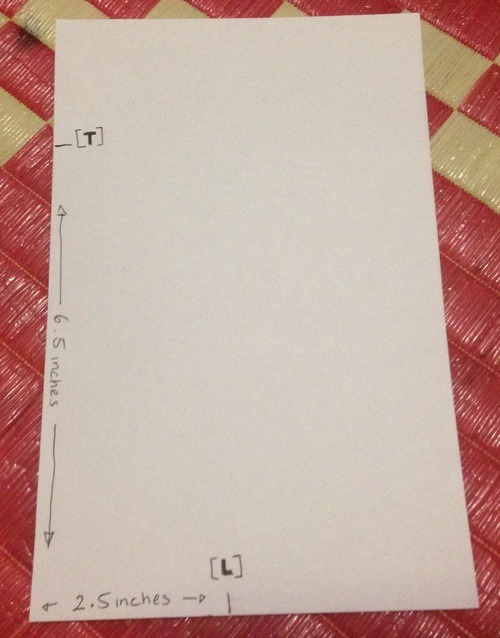
- Measure the circumference of (the length around)your head. Add at least 3 additional inches to make room for the fluffy brim later on. Divide it by 5, then divide the answer by 2. This measurement will be called [T]. (example: My circumference was 22in. I added 3 inches, making it 25in.Divided it by 5; 25in ÷ 5 = 5in. Then divided it by 2; 5in ÷ 2 = 2.5in. [T] = 2.5in)
- Measure the length from the back of your head toyour forehead. Divide this by 2. Thismeasurement will be called [L]. (example: my measurement was 13in. Divided it by 2; 13in ÷ 2 = 6.5in. [L] = 6.5in)
PART 2: PATTERNING
- Fold a piece of paper in half.
- Mark [T] on the fold and [L] as indicated in picture.
- Draw a gentle, gradual curve from [T] to [L]. This will create the round body of the hat.
- Add some seam allowance. (I went with 1/4 inch and screwed it up in the picture.)
- Cut out your pattern and unfold.

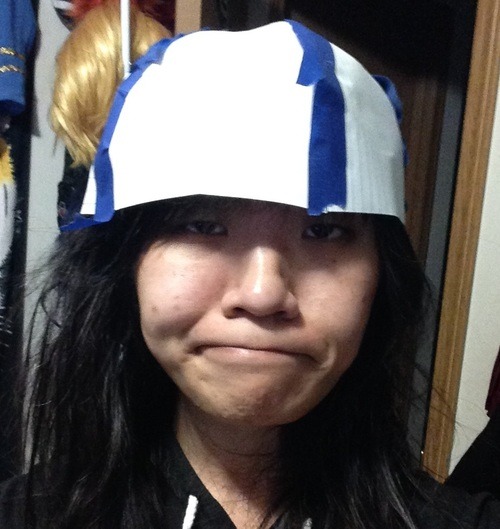
[optional]: make 5 pieces and test out your pattern by taping them altogether. It could help you adjust the size, shape, etc. Make sure that it is a bit roomy since it will get snug after adding the brim.
PART 3: CUTTING THE PIECES
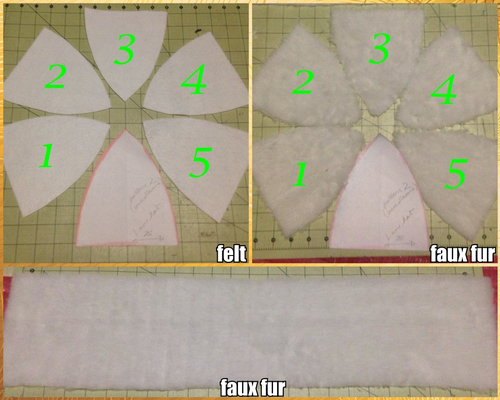
- Lay your pattern on top of the white felt and trace the shape with chalk. Cut out 5 pieces.
- Lay your pattern on top of the white faux fur and trace the shape with chalk. Make sure that the fur direction is consistent. Cut out 5 pieces.
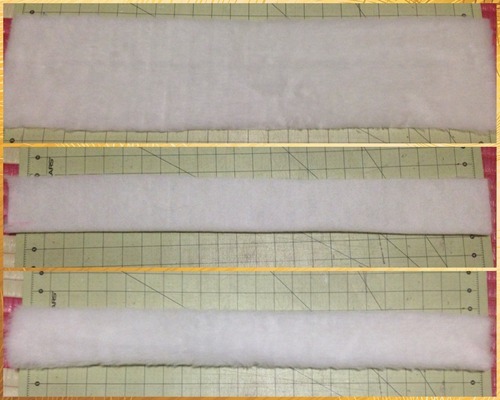
- Remember your original circumference measurement? If not, measure again. Add at least 8-10 extra inches . This will be called [D]. Cut out a rectangular piece of faux fur that is [D]in long and 5in wide with seam allowance. This will be the cotton-stuffed brim and will become very snug, thus needing the additional length.
DOUBLE CHECK! You should have 5 patterned felt pieces, 5 patterned fur pieces, and 1 rectangular fur piece.
PART 4: SEWING
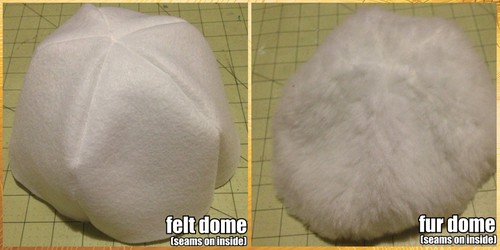
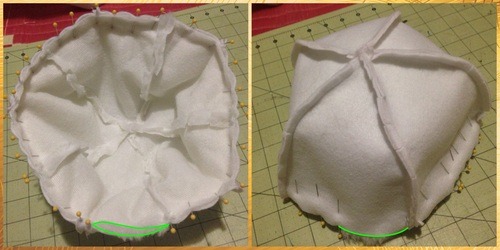
- Pin the curved edges of the felt patterned pieces together and sew.
- Pin the curved edges of the fur patterned pieces together (fur sides facing each other) and sew. Be sure to tidy up the fur that spills over the edges by pushing it inward.
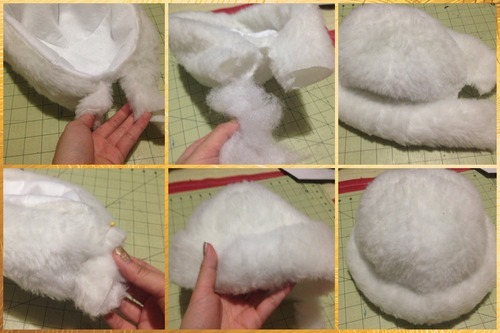
- Fold the rectangular fur piece lengthwise (hotdog-style) with the fur on the inside. Pin and sew the long side, leaving the ends open to form a tube. Turn the tube inside-out.
DOUBLE CHECK! You should have 1 felt dome, 1 fur dome, and 1 fur tube. Take a water/drink break, you beautiful thing.
PART 5: ASSEMBLY
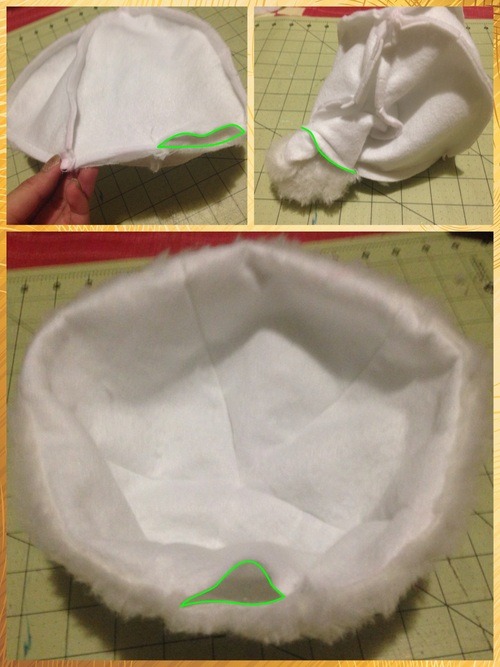
- Turn the fur dome inside-out so that the seams are hidden on the inside.
- Keep the felt dome seam-side out and place it over the fur dome.
- Pin the domes together, but leave a section unpinned. This is needed to turn the hat inside-out later. (refer to green line in picture)
- Sew the domes together, remembering to leave a section open.
- Turn the hat inside out push the felt dome into the fur dome.
- Hand sew or hot glue the open section closed.
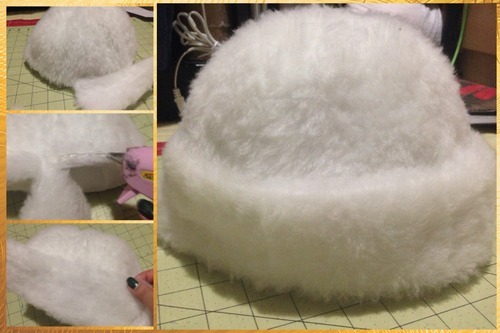
- Hot glue the fur tube to the edge of the hat. Leave the ends of the tube open.
- Stuff the tube LOOSELY with cotton until content with the shape.
- Sew the tube ends shut and together. Your base hat is complete! Pat yourself on the back and take a snack break, you wonderful person, you.
PART 6: SPOTS
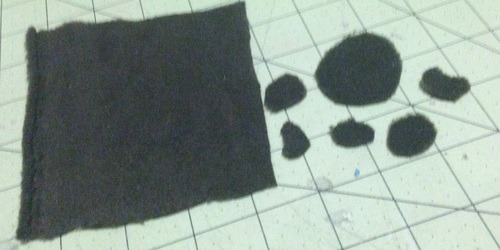
- Cut a bunch of small and medium sized oval-shapes from some brown fleece/felt.
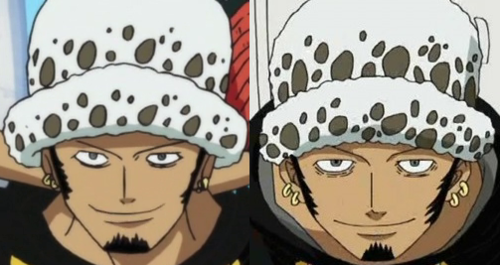
- Pull up your favorite reference picture (smiling Law is best Law) and hot glue the shapes in a similar pattern. Get them to stick to the base of the faux fur rather than the fur fibers. Glue down large pieces first then work smaller ones around them.
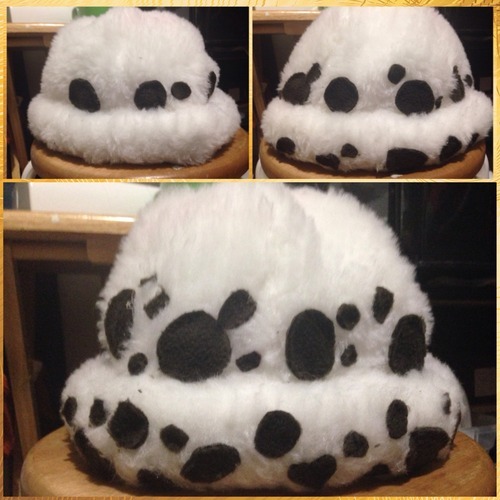
You're now one step closer to being captain of the Heart Pirates! Congratulations! :D Thank you for putting up with this tutorial and have a wonderful day/life ^_^
P.S. Don't feel discouraged if it doesn't turn out right! It took me 3 tries to develop this hat because I kept trying to make painted spots happen, got too carried away with painting, the brim was a little too big, the sizing was off, etc.
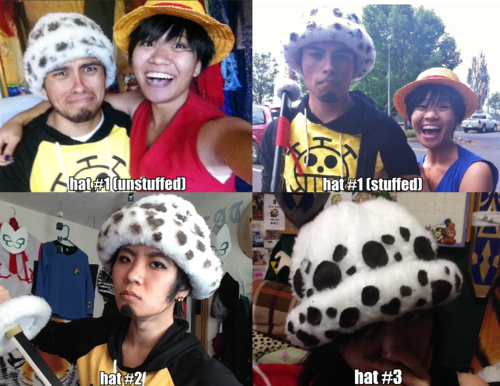
Hat #3 was a fourth attempt and made by following this tutorial.