For this tutorial, I happened to be working on Ao Nanami from Yozakura Quartet. The wig and “ears”/antennae were probably the hardest part of this costume but relatively easy.
First of all, I didn’t order any extra wefts to cover her ears/antennae so I ended up salvaging fibers from what I cut off. When first styling this wig I actually cut the back waaaay to short and ended up switching wefts around and making some to fix my mistake. OTL But anyways, onto ears!
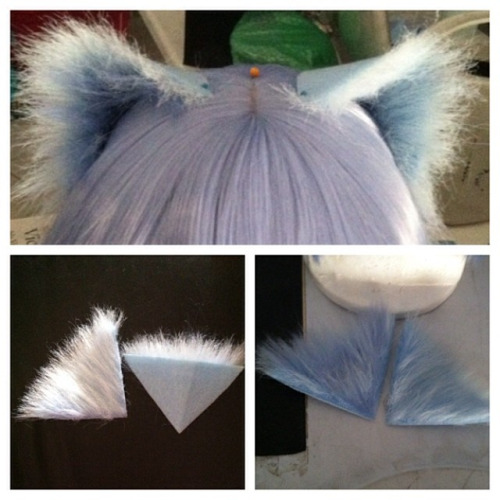
(This is a work in progress shot so the outside of the ears are not yet covered)
Step 1. Take a rigid felt in a color closest to what the color of your ears will be and cut triangles for the ears/antennae. This happens to be in the style of cat ears so they are simple triangles that fold down the middle.
Step 2. For the interior you can use a fake fur that is the color of your ears or you can dye it with sharpies and attach it to the felt.
(Mine was originally white and colored it light blue with sharpies. I was still not happy with the color match, so I started to incorporate the wig fibers into the fake fur to create a deeper blue that’d blend with the base wig better. Also, my fur was too fluffy and full for my taste so I actually razored it down too.)
Step 3. Cover the outside surface of the ears/antennae with the wig fibers that match your wig by gluing them down with tacky glue. Do small sections at a time so you’re not overwhelmed and can lay the fibers down evenly. Make sure the fibers are going in a logical direction and not just haphazardly placed. It’ll help it blend into the wig when you attach them as well as just look cleaner.
Step 4. Attach your ears/antennae onto the wig by doing small hand stitches in a thread color that matches and done!